It shows that the surface of the stone fireplace is less than 50 degrees. During the winter months the stone radiates cold air. I drew a quick sketch showing all of the temperatures i measured. As you might have guessed, the worst areas were at the seams and corners.
One thing you might be surprised at is that one wall was reading less than 30 degrees. Now mind you that this is inside the house, with the temperature outside of 8 degrees Fahrenheit.
At that point the only thing i could think of was that the builders forgot to put insulation in that wall. But there wasn't much i could do in the middle of February so i just caulked the corner and stuffed some in insulation where i could.
I also insulated the fireplace, thinking that would help. It might have helped a little but it was still cold in the room.
So it finally came time for Karrie and I to redo that family room. We decided to to tear down the wainscoting, put in new insulation, caulk, paint and put up new baseboard and crown molding. Here's our quick sketch showing how many boards we needed, square footage for insulation, length of trim and other tools.
We figured that if we didn't do it now, we wouldn't be able to do it in the middle of winter. For reference here's what the room looked like before we started.
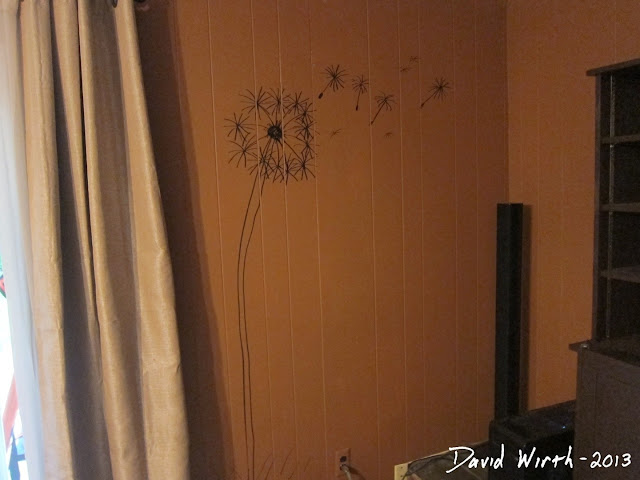
Just to make sure we didn't chicken out and procrastinate, we drew on the walls with a Sharpie. That way we were definitely going to tear the walls down that coming weekend.
I thought that the far tree looked kind of good, it was fun getting out our "artistic" expressions.
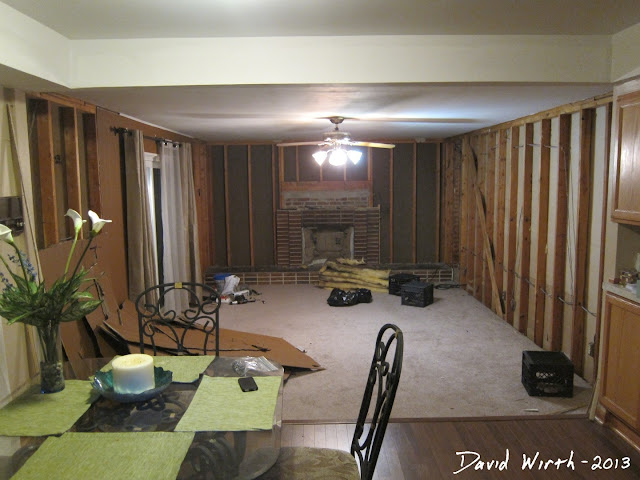
The next day, with the help of Karrie's sister we ripped down the old walls to have a look at the old insulation. At first it didn't look to bad and was afraid we were wasting our time.
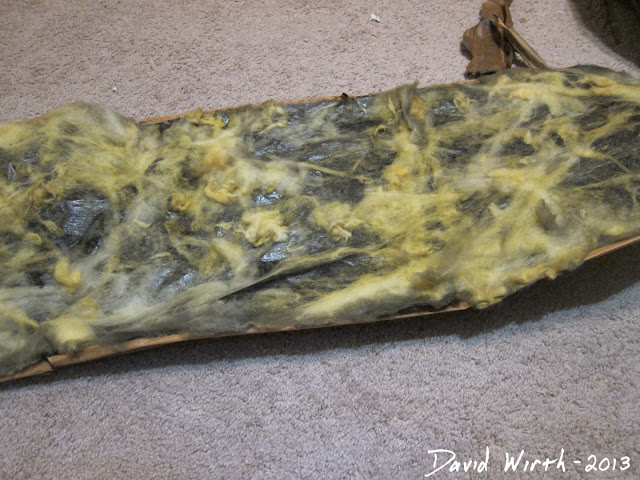
But on the opposite side of the insulation we saw the problem. The fibers them selves were really old and brittle and it had black stuff on it in patches. Not sure if it was mold. Plus putting up insulation is cheap and easy. If we were going to go through all the trouble of redoing the walls, replacing the 50 year old insulation was a no brainer.
Here's what it looked like when we had all the boards off and insulation torn down.
Remember the area by the fireplace where it was reading 30 degrees? It turned out that there really wasn't any insulation, kind of like i had guessed. All that was left was the insulation paper, all the insulation was gone.
I'm not sure what happened, whether it rotted away or somehow disintegrated. But i felt better ripping everything down knowing that it needed to be done. It probably would have been colder if it were an outside wall, luckily the worst part was where it abutted the garage. But we removed all the boards and insulation and filled up many garbage bags in the process.
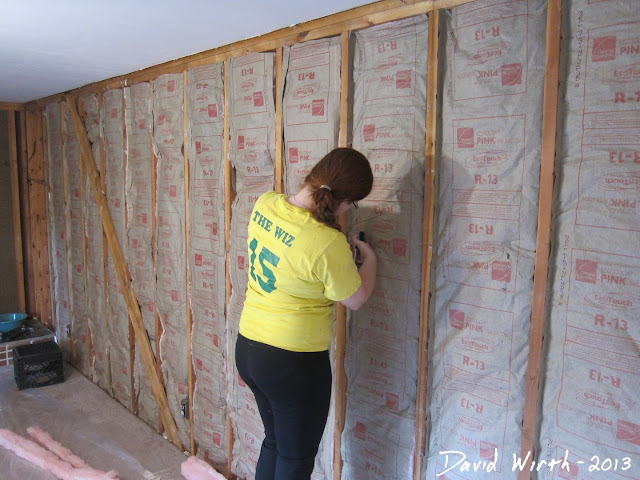
The next weekend Karrie's sister came back along with her dad to help put up drywall. We went to Home Depot to buy 9 rolls of R-13 insulation and 13 - 4'x8' pieces of 1/2" drywall. I wanted to use the heaviest insulation i could, i was going to get R-19 or R-30, but after talking to our friend Jeff, he said that those wouldn't fit in the walls, they are used for 2"x6" walls and attics. Also we bought drywall mud, screws, joint tape and some miscellaneous trays and tools for installing drywall.
So we got home and started working. At first we were all working in the insulation. I used a can of Great-Stuff foam and sprayed it at the bottom of the wall joists. I figured it couldn't hurt to fill in any gaps. The next day i was really surprised to see how much it did work.
I guess the gaps in the wall were bigger then i thought. Here's what it looked like from the garage side, the foam had squeezed out through the cracks.
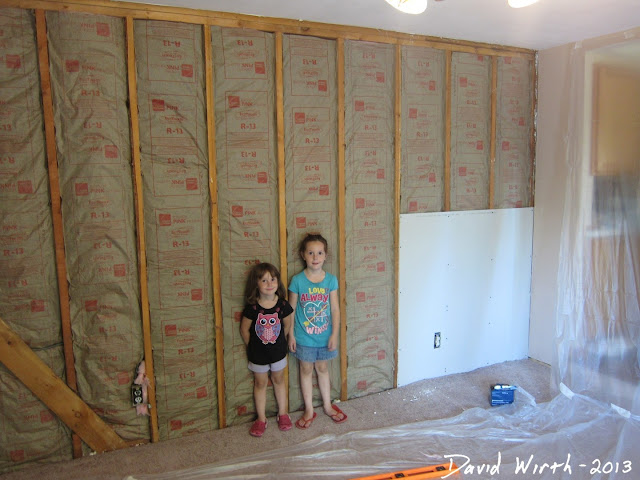
Putting up the insulation went quickly and soon Karrie's dad and i started doing the drywall. Karrie and her sister kept stapling all the edges to the studs.
We were cutting the boards out on the patio using 2 saw horses as work stands. I also got to use my Dremel rotary saw for some of the small cutouts (like around the electrical outlets). Emma and Olivia were happy with it.
Everything seemed to go really smoothly and throughout the day we made good progress. Karrie and her sister helped screwing in the drywall after they finished with the insulation.
Here's our cutting area outside. It was nice having this area just outside the sliding door. It kept the dust from getting in the house and it was a beautiful day.
Around the fireplace there was concrete block and we weren't able to screw the drywall to anything. So we had to use Liquid Nails to glue the boards to the wall. When we were trying to find something heavy to keep pressure on the board i thought of the perfect thing, my 50 pound anvil.
One neat trick i thought of was using the laser level to indicate a line to screw into the stud. This was a lot quicker then measuring and marking with a pencil. The laser level also had 2 needles that stuck to the wall and could pop off easily.
As we were continuing to put up the drywall, Karrie and her sister started with the real work, mudding the joints.
Mudding and sanding, then again, and again. It took several days and was lots of work. I thought that filling in the joints would be the easy part, turns out that it was way harder then putting up the drywall. This is what it looked like after the first or second round of mudding and sanding, i can't remember.
But finally we were ready for paint. Before we put on the actual paint with color we decided to use a white primer. I bought a can of Valspar primer that was for drywall, it was only $12. I ended up having to go back and buy a second one. We used 1 1/2 cans on the walls and the remainder we used for painting the trim at the end. In hindsight i should have bought the 5 gallon bucket of primer for $35. We would have definitely used it for some of the upcoming projects.
The new drywall really absorbed the primer. This is a picture of Kristina and I finishing up and Kyla taking a quick break on a milk crate.
The next day Karrie and i painted the final color, it was from Valspar Signature called Coconut Milk, kind of a tan-white. It looked very white, but then when compared to the white ceiling i could see the difference.
We also got 2 cans of that paint because we decided to paint our kitchen as well. That way it had a seamless transition between the kitchen and family room. Karrie did 90% of the painting one day after work. By the time i got home she was mostly done and i just had to help with the edges and corners. The next day we finished painting the kitchen.
The next weekend we were ready to install the baseboard and crown molding. It was a bit of a surprise to see how much that stuff cost. We ended up spending close to $80 for everything; 60 feet of crown molding, 24 feet of baseboard and 24 feet of round-over.
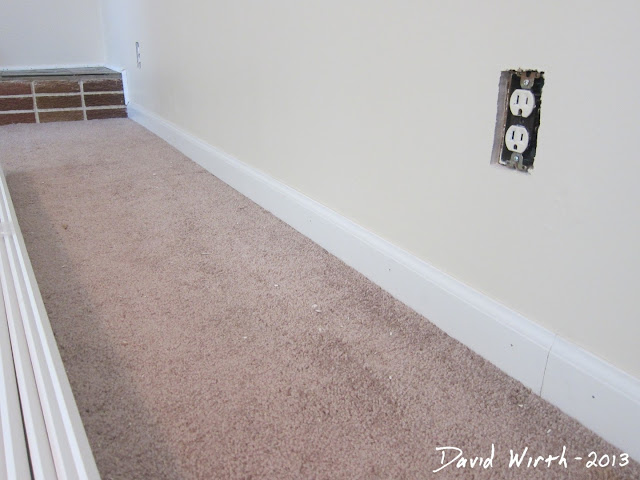
The baseboard went in really easily and immediately looked great. The round-over was for the stone fireplace. That took a bit longer but wasn't too bad.
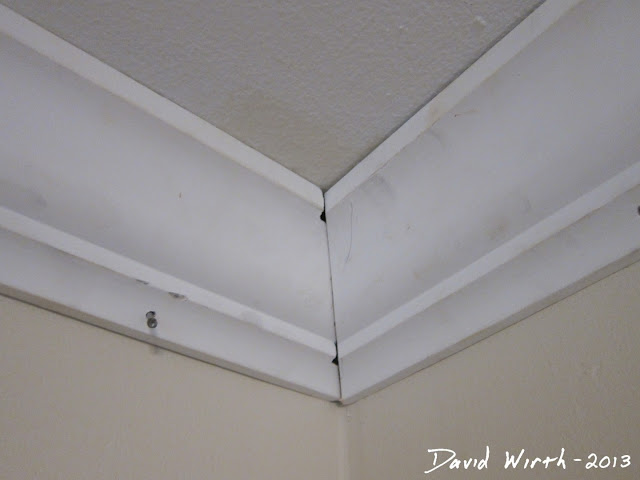
The real pain in the butt was putting in crown molding. Crown molding was a terrible because it took 2 people to hold the boards up to the top of the ceiling, cutting had to be done with the board held at a 45 degree angle and upside down, and the boards themselves were 12 feet long. It took me several hours and many Youtube videos to figure out how to correctly cut the boards. All of the corners were a compound cut, meaning the saw was set at one angle and the board had to be held at another angle. Here's the first corner i did, sadly as terrible as it looked, this was my 3rd attempt after several hours.
I pre-drilled all the nail holes and used a stud finder to make sure i wasn't nailing just into drywall. To make a long story short, the whole process was basically 2 steps forward, 3 steps back. The first board we put up and took down different several times before i had the angle right.
Finally it seemed like it was going ok and i had the hang of everything, until i started working on the back corner. For some reason the boards didn't seem to match up and it took me cutting the angle 3 times before i realized that the walls of the house didn't make a 90 degree angle. Plus the ceiling had a dip and rise.
The 2 walls made more of an 86 degree angle, but it was enough to screw everything up. So i had to cut on of the boards at a +-49 degree angle and even then it wasn't great. But at that point anything close to being ok, was good enough. I figured i could make up the difference with spackle.
When we had all the boards where we wanted them, we then had to go back and counter sink the nails into the board, here's Karrie doing that.
Then we had to go back to the drywall mud and fill in all the nail hols, gaps, and corners where we messed up. Karrie then used a tube of paintable white caulk which was specifically for crown molding. First she caulked the baseboard and round-over, it made everything look 100% better. The caulk made it look seamless and got rid of the dark line gap where the board didn't fit perfectly to the wall.
Then she went along the top and bottom of the crown molding and that too looked way better after she was done. Here's her caulking along the round-over by the stone fireplace.
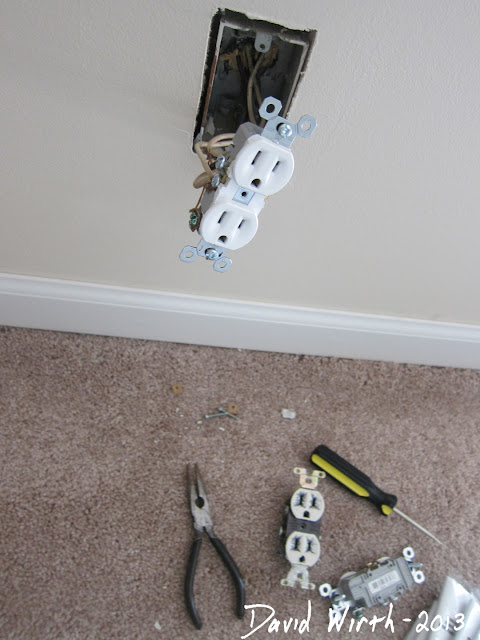
We had also decided that we might as well change out the old outlets and covers. Since they are only like 48 cents for outlets it wasn't a big deal. Although i wasn't sure that i had reconnected all the wires properly, but after we turned the power back on it all worked. It would have made for a sore sight to do all this work and just leave in the old outlets and covers, this makes it all look new.
That's when we realized that we didn't cut the holes in the drywall as tightly as we should have. There were gaps around the outlet covers. So we went back to Lowe's and bough some "jumbo outlet covers" and that fixed the problem.
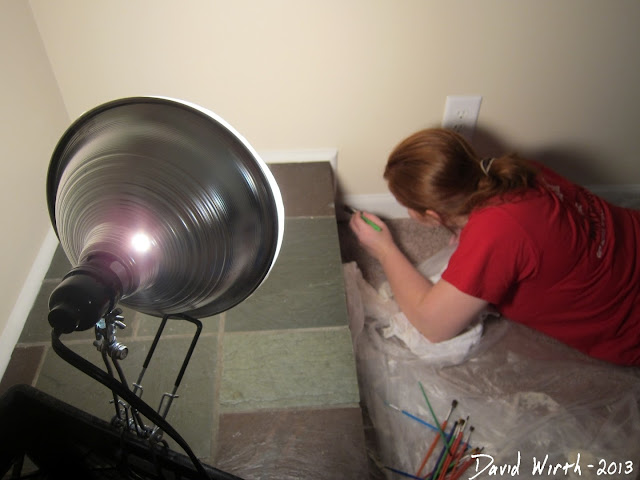
The last thing to do was go back with the white primer and paint over the baseboard and crown molding. Karrie was the one to do all of this. It took many hours using little brushes.
But when it was done it looked great. It has to be the nicest room in the house now. And the new 50 cent outlets and covers make a big difference too.
Here it is all done, the carpets vacuumed and fireplace stone cleaned up. With everything, the baseboard, outlets, crown molding, it really looks nice. I hope it stays warm this winter. It has to be better then the last few years where we had no insulation at all.
And this is what the whole room looks like all done.
Looking back at that original sheet, we were actually really close to our original cost estimate. We went over a little because we needed 2 cans of primer and a second can of paint. Originally we weren't planning on painting the kitchen.
It ended up being a lot more work then i thought. The worst parts being the drywall mudding and crown molding. It might be a while before Karrie convinces me to redo another room in the house.
You have read the best review article categorized by and the title Family Room - Drywall Trim Crown Molding and Paint. You can bookmark or spread this post by using this URL https://duiattorney-info.blogspot.com/2013/08/family-room-drywall-trim-crown-molding.html. Thank You!












Comments :
0 comments to “Family Room - Drywall Trim Crown Molding and Paint”
Post a Comment