Which means that it's time to clean out the garage, or else it will never get done. Actually i wanted to make room so that Karrie could park her car in there and not be covered in snow. A few months ago it was completely packed full of stuff. Since then i've given away my old broken Snapper riding lawn mowers and a bunch of other junk. I also moved some boxes to the basement, cleaning that mess is definitely a job to be done this winter. But for the rest of the stuff, i decided that a big wood shelf was needed to store it all.
Now i could have just bought plastic shelves at Meijer or Lowe's but they are expensive and wouldn't provide as much space. I have a couple of really nice heavy-duty plastic shelves in the basement. They are great for small stuff but the wood shelves i planned on building would be stronger, larger and cost a lot less.
A few weeks ago i made a tool rack for all the garden tools and hung that on the wall in the garage. So far it's been great. The big PVC pipes are easy to use and strong.
Seeing how well this tool rack worked out gave me an incentive to get the rest of the stuff in the garage cleaned up.
My plan was to build four 8 foot shelves made of pine 2x4's and OSB (oriented strand board - sometimes called particle board). 8 foot just makes sense because there will be less cutting since they all come in 8 foot sections. I decided to use 2x4's because they are cheap. And decided on OSB because it's relatively cheap but really strong. They make OSB in 7/8" and 1/2", they were only a few dollars different in price so i went with the 1/2" thickness.
I first drew up the design on paper but then i decided to get more detailed and use Google SketchUp. I've used Google SketchUp before to draw the two twin beds.
SketchUp is great for several reasons. It's free. It's easy to understand, which means it doesn't take hours trying to learn how to draw, though it does help if you spend 8 hours a day using AutoCAD. It's just a really nice program that lets you draw 3D object very quickly. And there's tons of Youtube video's that you can watch and learn different tricks.
I not only wanted to get the shelf right, but i wanted to make sure that it fit in the garage. So i measured my garage interior dimension and then drew it up. I added the two side doors and the big front garage door. Then i drew the shelf itself and tried different orientations. The first picture at the top is what i came up with after lots of fiddling around. But here's the dimensions for the final shelf design. This was probably version 6, and the third time i redrew it.
If you want to download the actual Google SketchUp files, which are .SKP and .SKP, i uploaded them to my Google Drive. You can download them from these two links:
I actually got a bit carried away with what i could do. Here's an early version where i though about covering all the walls in the garage with shelves. This was also when i thought that i should attach the 2x4's to the floor and ceiling.
But this is why Google SketchUp is great, it lets you zoom in and actually see what it will look like when you are done. It gives you any perspective view from any angle. That is when you realize things like, will the door shut, how tall will it look, do i need 4 shelves or only 3.
Now having said all that, the funny thing is that i didn't check was whether or not a car would fit. It turned out to be ... not really. If i pushed the shelf all the way over to the right a car could maybe fit, but there wasn't enough room to open the driver side door.
So even though this was my final designed drawings, the final location for the shelf was for it to be flat against the on the right.
Material List:
Description Height Width Length Quantity Price Total
2x4 2" 4" 8ft 15 $2.50 $37.50
OSB 1/2" 4ft 8ft 2 $13.00 $26.00
Also i ended up using around 200 - 2.5" deck/drywall screws, which cost around $4.
The total cost with tax was just under $70 which seemed like a lot at first. But then you figure that a cheap plastic 4 foot high shelf cost around $40.
Here's all the wood i bought. Actually i only needed 14 - 2x4's but i got one extra, just in case.
This is what the garage looked like before i started. I made a 360 degree panorama of garage, combining around 18 pictures to make this one.
(click to enlarge)
The first thing i did was to clear the area where the shelf was to go.
And right away i ran into a problem. Measuring from the back wall to the old wall hanging shelves i got 7.5 feet. Which meant that i would have to cut at least 6" off. So i cleared everything off the shelves, unscrewed them from the metal brackets and cut off 10", just to be sure.
While cutting the shelves i decided to also lower the bottom shelf for more room. There used to be a board with weird hooks which in the way. I never used it, so i just took it off the wall. Before the bottom shelf was only 8" from the shelf above it. By taking off the board with hooks i was able to drop the metal brackets all the way down. You can compare this picture with the one a couple above and see the difference.
Moving all of the junk, putting everything back, cutting the old shelf and all that was a lot of work, but when i was done it looked the same as when i started.
The next day i cut the short end boards and started to lay out the shelves. These would be the vertical end pieces.
After taking this picture i realized that i had the screws flipped backwards. It might not seem like a big deal but if i left it like this then the screws which connect the side boards would hit each other. So i had to remove these screws and flip them horizontally. You will see what i mean later when i attach the front and back 2x4's.
That's when i decided to make a pattern for each of the different screw layouts. It was a great idea that saved me tons of time in the end. The top pattern is for the shelf boards i would cut out later. The left pattern is what i needed for the boards above. The right pattern is for the front and back facer boards
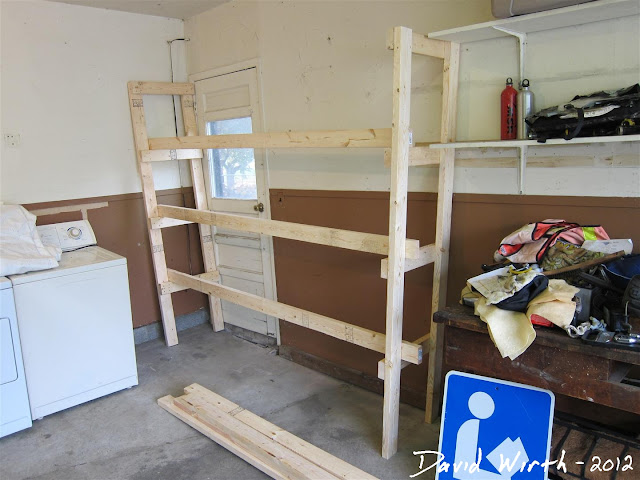
With the end pieces all screwed together i set them in place just to see how it would look and see if it all made sense.
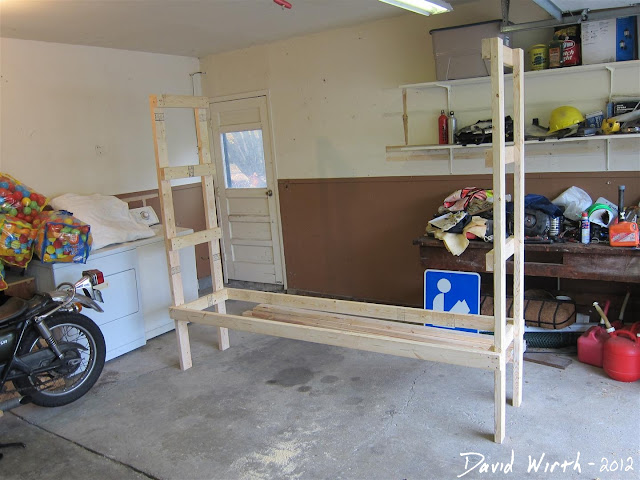
Then i screwed in the first front and back shelf boards and stood everything up.
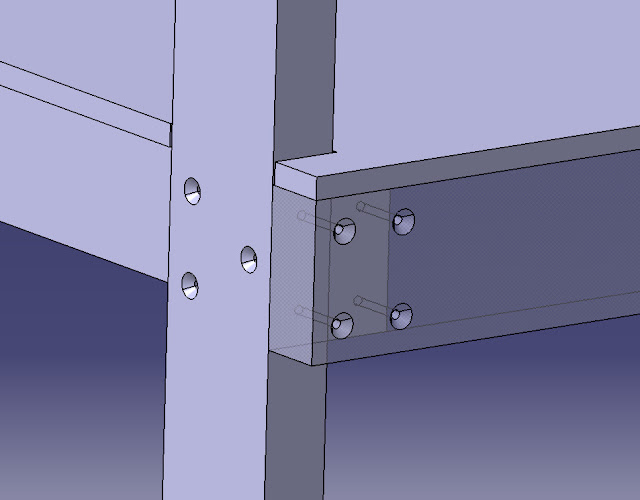
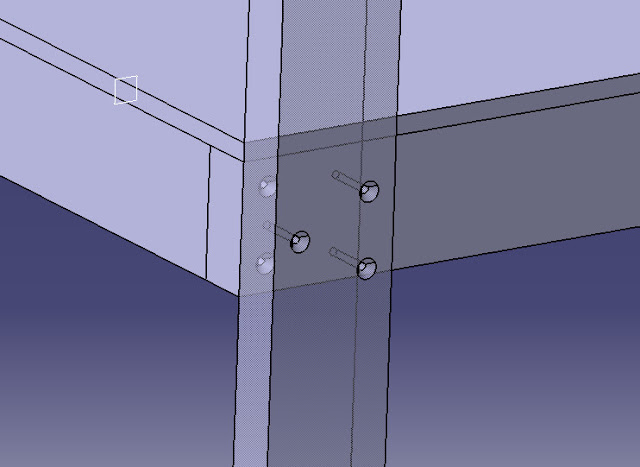
Here's the way i connected all the boards together. Had i not changed the screws earlier, all 4 or these screws might have hit them.
The interlocking way in which the 2x4's all fit together was a design i decided on with some help from John. When Karrie and i went to Katie and John's cottage, he drew this out on the computer.
This was my original idea. It seemed simple, but isn't as strong, since there aren't as many faces touching and screws holding it together. The final version is more compact and everything interlocks with each other.
Next, using a jig saw, i cut out the U-shaped notches using the cardboard pattern from earlier.
Here's a closer look of how the OSB shelf fits into the 2x4 support posts.
Looking at this picture you might think i forgot a few steps, but actually i didn't. Putting the OSB shelves in before attaching the 2x4's was necessary. If i didn't do that first then i would have never been able to get the shelves in.
That's because i had to actually pull the 2x4 uprights apart to be able to slide the shelf boards in and if i screwed the 2x4's in then i wouldn't have been able to pull them apart. Luckily i realized that before attaching all the 2x4 cross beams.
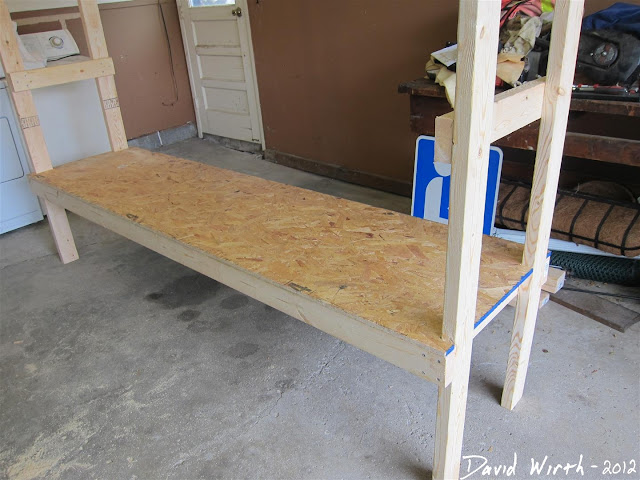
But after cutting all the shelves and fitting them in place i was then able to screw the 2x4 front and back supports together. To make sure it was all square i screwed them in with the shelf on it's side. By this time it was getting pretty big and heavy so i had to get karrie's help to put the shelf down and stand it back up.
But i was able to push it into place by myself and take a look at it. I knew from the start that i was going to have an issue with the shelf not being level because the concrete slab in the garage is much higher near the back wall. You can see the crack in the slab underneath the shelf.
I thought about all the different ways i was going to make sure it was level. I though about making the front legs longer or maybe trimming the back legs. But i decided that the best idea was to just make the shelf square and level and then deal with the uneven floor afterwords. It was off quite a bit.
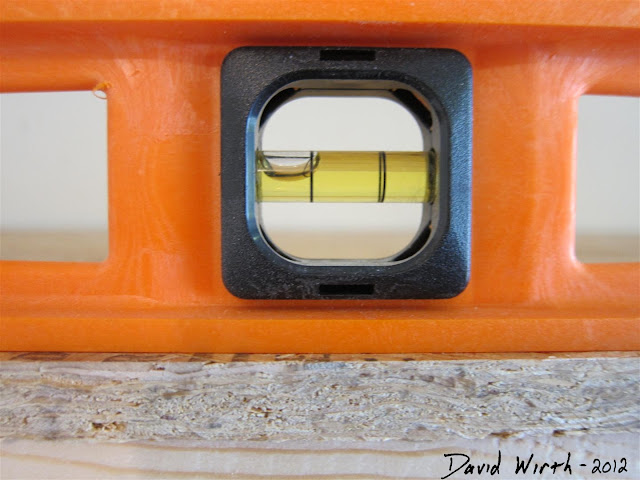
So i lifted up the shelf on the right side and, after trying a series of different thickness boards, found out that using two 2x4's would make the shelf almost perfect.
Close enough for me.
I pushed the shelf back into the corner as much as i could and did a few things to make sure it wouldn't move. I screwed the floor 2x4's together and attached the upright to them with just one screw
Then, so that the shelf didn't tip over, i screwed it to the wall in a few places.
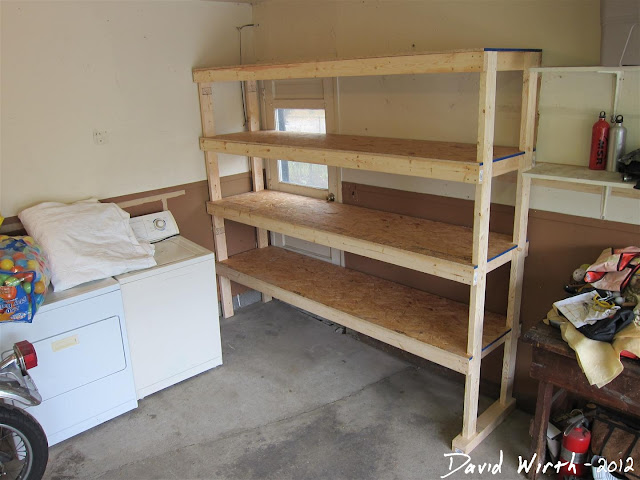
Here's the finished shelf in place, level and secured to the wall.
I actually got really lucky. The second shelf cleared the handle of the old door by a couple of millimeters. I totally didn't think about the door handle until i went to push it in place. If it didn't fit i guess i would have had to trim a few inches off the legs.
Then it was time to start loading up the shelves. Hopefully it will have enough room for everything. otherwise i'll have to build another one.
I took a break, then came back a few hours later to start hanging stuff on the wall. I used those rubber coated hooks and screwed them into the studs behind the drywall. I admit that i got a little crazy hanging the wood bench i made for Karrie on the ceiling, but it did save a lot of room.
Over the winter karrie and i are going to go through all the stuff we have in boxes in the basement and sort them. Some of the less important stuff can go on these bottom shelves. I haven't totally fill it up just yet.
You have read the best review article categorized by and the title How to Build a Shelf for the Garage. You can bookmark or spread this post by using this URL https://duiattorney-info.blogspot.com/2012/10/how-to-build-shelf-for-garage.html. Thank You!

.JPG)

.jpg)


.jpg)





.JPG)

.JPG)
.JPG)

.JPG)

Comments :
0 comments to “How to Build a Shelf for the Garage”
Post a Comment