Here's a link to my previous post where i photoshopped a pond to the spot of my yard where i was planning on putting it.
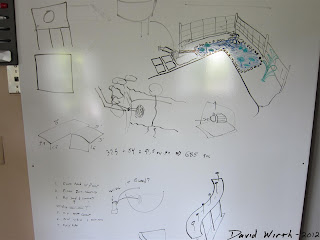
I started digging without really having any plan of how i would build the pond. I knew i needed a hole in the ground and this whiteboard picture, along with the Photoshop drawing above, i figured it would work out ok. I was hoping to make a nice peaceful spot where my lotus plants could grow.
This is where i came up with the idea of using a pool pump to circulate the water. I realized that pool pumps are set below the level of the water and use gravity to feed the water to the pump. So i would have to dig an adjacent hole for the pump.
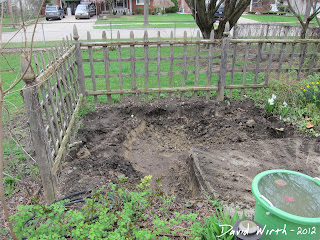
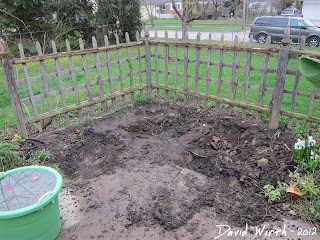
So i started digging. It was fine at first. Nice soft organic topsoil.
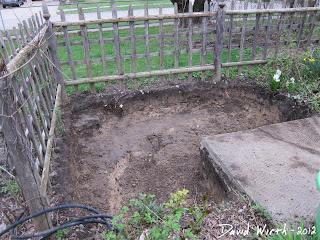
Another day, i dug a little deeper. That's when i started to hit the layer of clay. My entire yard is clay which is super had and doesn't drain well. I realized that when i was trying to build my drain from the roof gutters.
It took several days of digging through the hard clay. At this point i was about 80% done.
I had planned on using a double liner of plastic and Tyvek since i have 2 big rolls but after digging the hole, and a good rainstorm, i realized that the clay in my backyard is about 95% waterproof already.
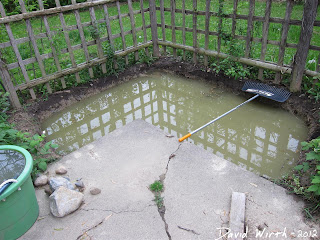
Every time it rained i would have to get that water out before i could continue to keep working I tried a pump but it didn't work as well as using a 5 gallon bucket and muscle.
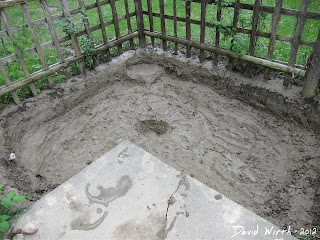
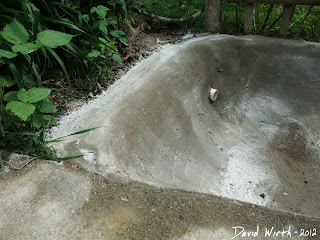
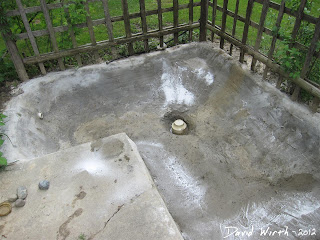
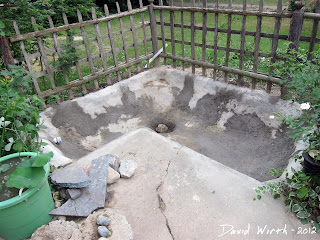
It was muddy afterwords but it actually helped to form smooth curves. I was able to shape the mud into the pond shape that i wanted. Notice the ledge at the middle curve of the pond. That is were i was planning on putting the rock waterfall. And the hole in the center was were i wanted to put the drain. I tried to make sure that everything sloped in that direction.
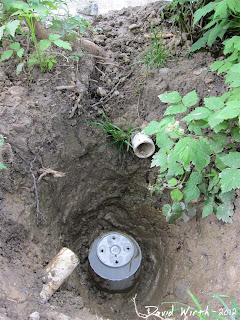
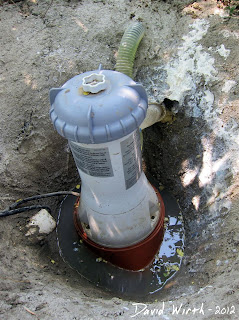
I also dug a pit for the pump. The inlet and outlet pipes had to be below the water level so that's why i couldn't just set the pump on the ground. Also the hole would help dampen the sound and hide the pump. Below the upside down pot was a 2 foot hole for drainage. The pipe in the middle is the incoming housing for the water, the pipe on the bottom is for the outgoing electric line.
So it was time to add the concrete, which is how i could line the pond and pump hole. I bought 6 bags of crack resistant concrete with fibers. There wasn't a lot of fiberglass in the bag though, but as long as it doesn't crack, i'll be happy. In order to allow the concrete to be formed to the vertical pond walls i needed to make a thick mix.
Materials:
I used the big shovel to mix the concrete, then shoveled it into the different areas of the pond. Then i used a combination of the hand shovel and trowel to form the sides. When it hardened a little i used my hands to smooth the tool marks. That's when i realized that there were going to be some soft areas and i would need to go back and fix them. But after 2.5 hours and 6 bags of concrete, i was done for the day.
Materials:
- concrete - 6 bags
- sand - 3 bags
- fine white sand - 1 bag
- concrete trowel
- wheel barrow
- buckets of water
- shovel
- hand shovel
I used the big shovel to mix the concrete, then shoveled it into the different areas of the pond. Then i used a combination of the hand shovel and trowel to form the sides. When it hardened a little i used my hands to smooth the tool marks. That's when i realized that there were going to be some soft areas and i would need to go back and fix them. But after 2.5 hours and 6 bags of concrete, i was done for the day.
Here's a time lapse video of me forming up the first few walls of the pond. I got a lot better at mixing the concrete and forming the walls as i went along.
http://youtu.be/KGkVdmOqDFw
Right as i finished spreading the concrete it rained again. So it filled up and again i had to use the bucket to drain out the water. That actually became a common theme over the next several weeks.
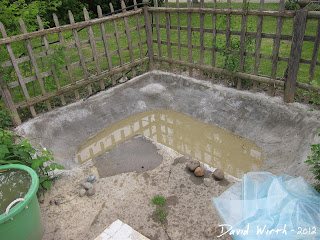
Once i drained out all the water i went through and checked all the concrete for cracks and weak spots.
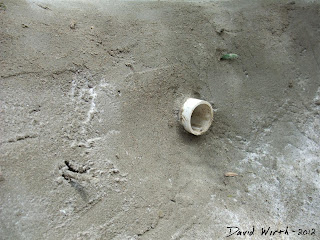
This is the outlet pipe where the filter will be. Inside of this PVC tube will be the corrugated plastic drain pipe that will go to the pool pump. At the end will be a plastic filter to keep out the large debris.
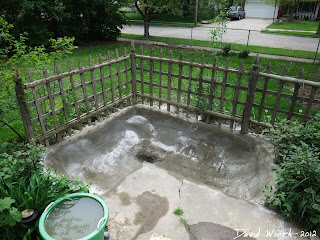
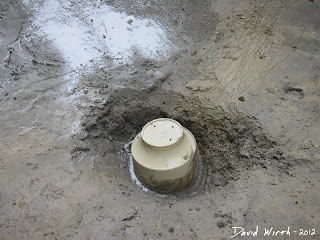
Just like in the pump pit, I used an upside-down pot at the top for the drain. Below the pot is a 3' hole that i dug using an ice auger. By the way, the white stuff in all the pictures is a very fine, white sand, i bought. I thought i could sprinkle it over the concrete to give a sandy smooth finish. It didn't turn out exactly as i had hoped.
I did need to mix another 80 pound bag of concrete and fix some soft spots. Areas where i either didn't put enough concrete or areas where the clay was so soft and muddy that the concrete didn't set up properly. I took a big hammer and a heavy rock to kind of smash up any thing areas of concrete to give it something to stick to.
Then when i tried to install the pool pump i realized that the 2 hoses that came with the pump weren't long enough to reach the pond. So i had to use a piece of PVC pipe to bridge the gap. Then i buried the pipes to hide them from view. This was the return pipe from the pump to create the waterfall.
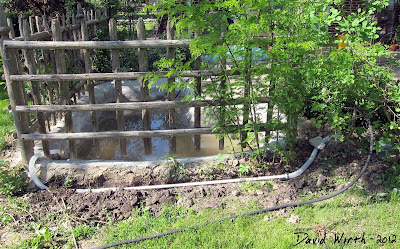
I then filled up the pond with water for it's first real test.
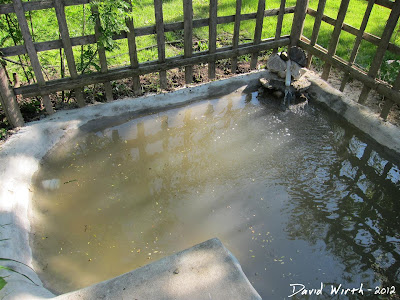
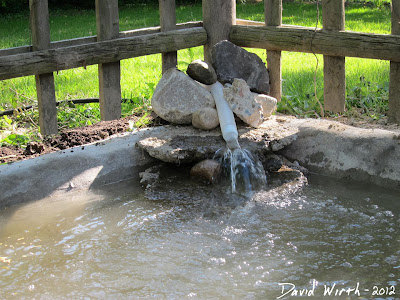
This is the temporary waterfall. I plan on making a better one once i have better rock and some more time. I'd like it to be about 2 feet tall and cascade down into the pond.
Here's a video of the pond, pump, filter and waterfall.
http://youtu.be/uVFRKPPqe9g
Then i noticed that a tiny trickle of water was leaking from the pond into the pump hole. I thought, "oh that's not a big deal, i'll just patch it." Well in order to do that i had to drain the pond, at least to a point below the intake filter.
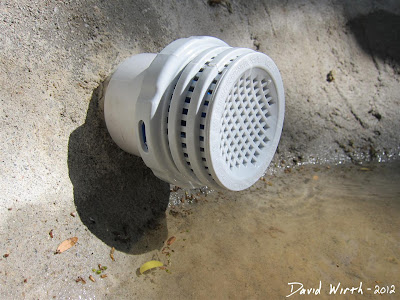
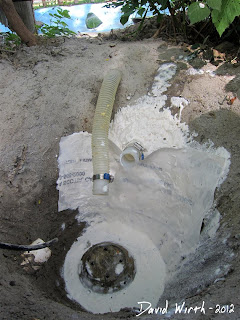
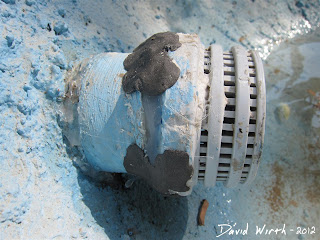
Here is the intake filter where the water is sucked out of the pond and goes to the pump. The water was leaking somewhere around this point.
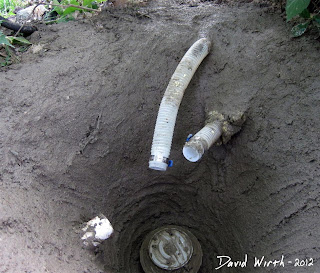
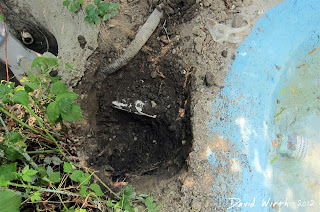
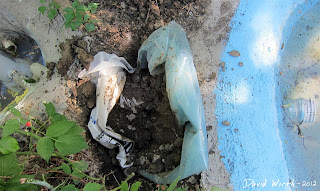
Here's the hole for the pool pump again. The white PVC pipe on the left is for the electric cord,
the two clear plastic pipes on the right are for intake and outlet of the pond water. It was leaking somewhere near that bottom pipe. So i first tried spraying in some Great-Stuff Foam. But it was an old can and it quickly clogged up. I checked the next day and found out that the water was still leaking.
Then i tried to use a different type of foam and a piece of Tyvek. Amazingly all of this didn't work either. The water still trickled in from somewhere around that bottom pipe.
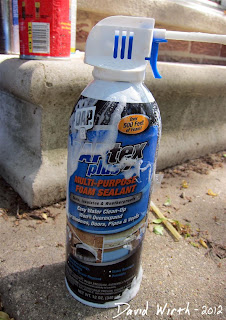
This was the foam i used, a whole can of this Dap foam. This stuff is terrible, really soft and gooey. Maybe it's good for sealing up gaps in windows but not good for other projects.
So once again i had to drain all the water out again to fix some more areas in the pond that were cracked. I used another bag of concrete to strengthen the weak areas.
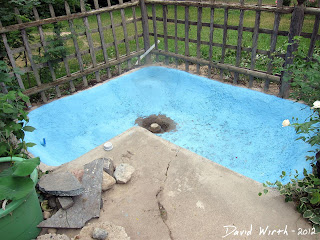
I thought that i had fixed everything so Karrie and i painted everything blue. We used an oil based paint that was designed to work underwater. It was only like $18 for a can. The blue paint really made it look a lot better. It gave it a nice clean look.
Then guess what...it leaked again. So i ripped off the Tyvek and got rid of the white foam.
I thought that it was most likely leaking from the loosely packed dirt between the pond and the pump. When i backfilled this area i basically just threw dirt and didn't pack it down. So i dug out the dirt and saw that it was pretty muddy.
Then i put more Tyvek on one side of the hole and plastic sheeting on the other side. I put clay in the hole and really packed it down with a mini sledge hammer and a big rock.
Guess what happened next...it still leaked. So i got the shovel back out and dug up all the dirt i had just packed. But the clay was completely dry, which meant that it wasn't draining through the dirt anymore. I realized that it was draining through the PVC pipe.
So i used JB Weld to glue the PVC cap and screen together. I had previously used hot glue but that obviously wasn't enough.
Then guess what happened... it still leaked. But then i finally figured out where the leak was coming from. Even though i sprayed foam between the two pipes, water was still getting through. So i pushed and packed the foam with my finger and a nearby stick back into the pipe. And that finally did it, there was no more water leaking from the pond to the pump hole.
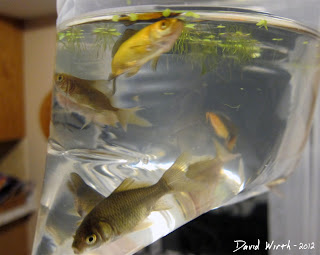
Finally with no more leaks i went to Meijer and bought some 20 cent fish.
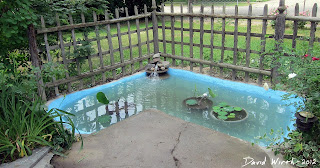
And i put the lotus and lilly-pad plants in the pond, which was the main reason i built the pond in the first place. All done it looks pretty nice.
To see more about the lotus plants and pictures of me putting them in the pond, i'll post a link here when i get around to it.
You have read the best review article categorized by aquatic plants for pond /
aquatic pond /
concrete pond /
filter /
fish pond /
how to grow lotus in pond /
how to make a backyard pond /
make /
pond pump
and the title Backyard Concrete Pond. You can bookmark or spread this post by using this URL https://duiattorney-info.blogspot.com/2012/08/backyard-concrete-pond.html. Thank You!

Comments :
0 comments to “Backyard Concrete Pond”
Post a Comment